실습
1. 필요모듈 임포트
import torch
import torch.nn as nn
import torch.optim as optim
2. 차원지정
inputs = torch.Tensor(1, 1, 28, 28)

print(inputs)

# 결과값 => torch.Size([1, 1, 28, 28])
▶ 1, 1, 28, 28 => 배치크기 * 채널(1: 그레이스케일, 3:컬러) * 높이 * 너비
3. 레이어 만들기
▷ Conv2D
conv1 = nn.Conv2d(in_channels=1, out_channels=32, kernel_size=3, padding='same')

out = conv1(inputs)

print(out.shape)

# 결과값 => torch.Size([1, 32, 28, 28])
- in_channels : 몇개의 함수를 넣을지 지정필터의 수와 같으며, 이 값이 높을수록 더 많은 특징을 추출할 수 있습니다.
- out_channels : 컨볼루션 연산 후 생성되는 특징 맵(Feature Maps)의 수
- kernel_size가 크면 이미지의 전반적인 특징을 더 잘 포착하고, 작으면 더 세밀한 특징을 포착.
- padding='same'은 입력 이미지의 주변을 0으로 채워서 입력 이미지와 동일한 크기의 출력을 생성함.
- 이미지 사이즈는 주로 stride와 padding에 의해 영향을 받음
4. 첫번째 MaxPool2D 만들기
pool = nn.MaxPool2d(kernel_size=2)

out = pool(out)

print(out.shape)

# 결과값 => torch.Size([1, 32, 14, 14])
▶ kernel_size=2, 높이, 너비의 값을 절반으로 줄임.(실제 이미지의 사이즈를 줄이는 형태)
5. 두번째 Conv2D 만들기
conv2 = nn.Conv2d(in_channels=32, out_channels=64, kernel_size=3, padding='same')

out = conv2(out)

print(out.shape)

# 결과값 => torch.Size([1, 64, 14, 14])
6. 두번째 MaxPool2D
pool = nn.MaxPool2d(kernel_size=2)

out = pool(out)

print(out.shape)

# 결과값 => torch.Size([1, 64, 7, 7])
7. flatten 객체 만들기
flatten = nn.Flatten()

out = flatten(out)

print(out.shape)

# 결과값 => torch.Size([1, 3136])
▶ torch.size([1, 3136]) => 64 * 7 * 7 = 3136
8. 클래스 나누기
fc = nn.Linear(3136, 10)

out = fc(out)

print(out.shape)

# 결과값 => torch.Size([1, 10])
▶ nn.Linear(3136, 10) => 3136을 받아 10개의 클래스로 나눈다.
CNN으로 MNIST 분류하기
1. 필요모듈 임포트
import torchvision.datasets as datasets
import torchvision.transforms as transforms
import matplotlib.pyplot as plt
from torch.utils.data import DataLoader
2. GPU 사용
device = 'cuda' if torch.cuda.is_available() else 'cpu'
print(device)

# 결과값 => cuda
3. train, test 데이터 분류
train_data = datasets.MNIST(
    root = 'data',
    train = True,
    transform = transforms.ToTensor(),
    download = True
)

test_data = datasets.MNIST(
    root = 'data',
    train = False,
    transform = transforms.ToTensor(),
    download = True
)- root = 'data' : 상단의 키 값을 가져오겠다라는 뜻
- train = True : True일때 train데이터를 가져오고, False일때 test데이터를 가져옴
- transform = transforms.ToTensor() : 데이터의 형태를 지정하여 받기
- download = True : True일때 해당 데이터를 다운로드
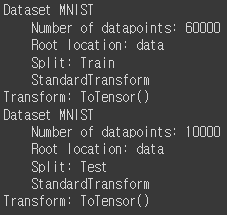
print(train_data)
print(test_data)
▶ print한 사진

4. 데이터로더 만들기
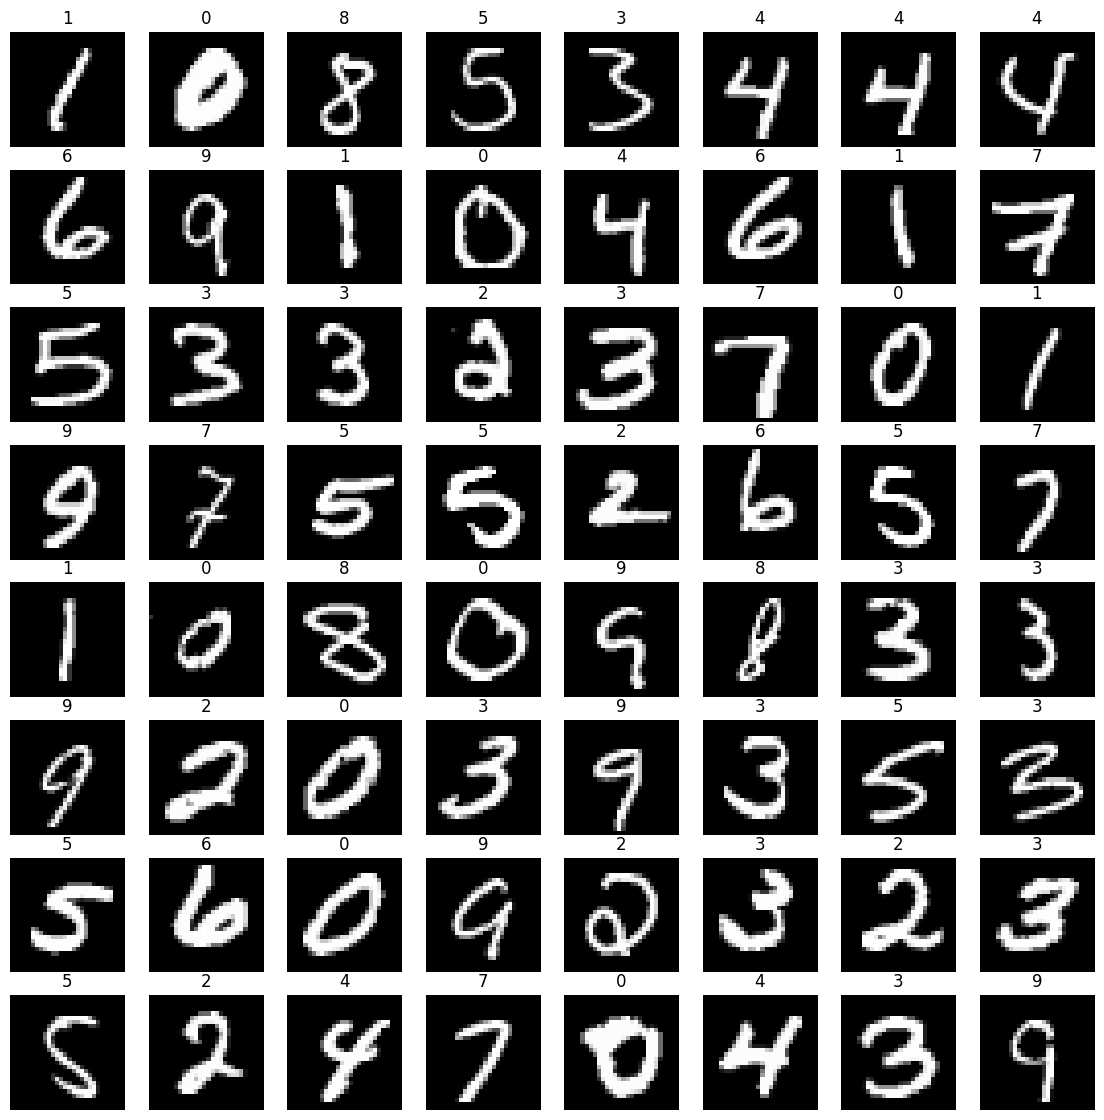
※ 단, batch_size = 64, shuffle = True, 8 * 8 형태로 이미지를 출력할것
loader = torch.utils.data.DataLoader(
    dataset = train_data,
    batch_size = 64,
    shuffle = True
)

imgs, labels = next(iter(loader))

_, axes = plt.subplots(nrows=8, ncols=8, figsize=(14, 14))

for ax, img, label in zip(axes.flatten(), imgs, labels):
    ax.imshow(img.reshape((28, 28)), cmap='gray')
    ax.set_title(label.item())
    ax.axis('off')
5. 모델 만들기
model = nn.Sequential(
    nn.Conv2d(1, 32, kernel_size=3, padding='same'),
    nn.ReLU(),
    nn.MaxPool2d(kernel_size=2),

    nn.Conv2d(32, 64, kernel_size=3, padding='same'),
    nn.ReLU(),
    nn.MaxPool2d(kernel_size=2),

    nn.Flatten(),
    nn.Linear(7 * 7 * 64, 10)
).to(device)

print(model)
- nn.Conv2d(1, 32, kernel_size=3, padding='same') <= 기울기를 계산함
- to(device) <= GPU를 사용하겠다고 선언
6. 학습시키기
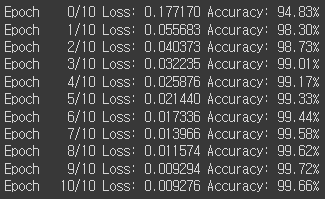
optimizer = optim.Adam(model.parameters(), lr=0.001)

epochs = 10

for epoch in range(epochs + 1):
    sum_losses = 0
    sum_accs = 0

    for x_batch, y_batch in loader:

        x_batch = x_batch.to(device)
        y_batch = y_batch.to(device)

        y_pred = model(x_batch)
        loss = nn.CrossEntropyLoss()(y_pred, y_batch)

        optimizer.zero_grad()
        loss.backward()
        optimizer.step()

        sum_losses = sum_losses + loss

        y_prob = nn.Softmax(1)(y_pred)
        y_pred_index = torch.argmax(y_prob, axis=1)
        acc = (y_batch == y_pred_index).float().sum() / len(y_batch) * 100
        sum_accs = sum_accs + acc

    avg_loss = sum_losses / len(loader)
    avg_acc = sum_accs / len(loader)

    print(f'Epoch {epoch:4d}/{epochs} Loss: {avg_loss:.6f} Accuracy: {avg_acc:.2f}%')
7. 검증
test_loader = torch.utils.data.DataLoader(
    dataset = test_data,
    batch_size = 64,
    shuffle = True
)

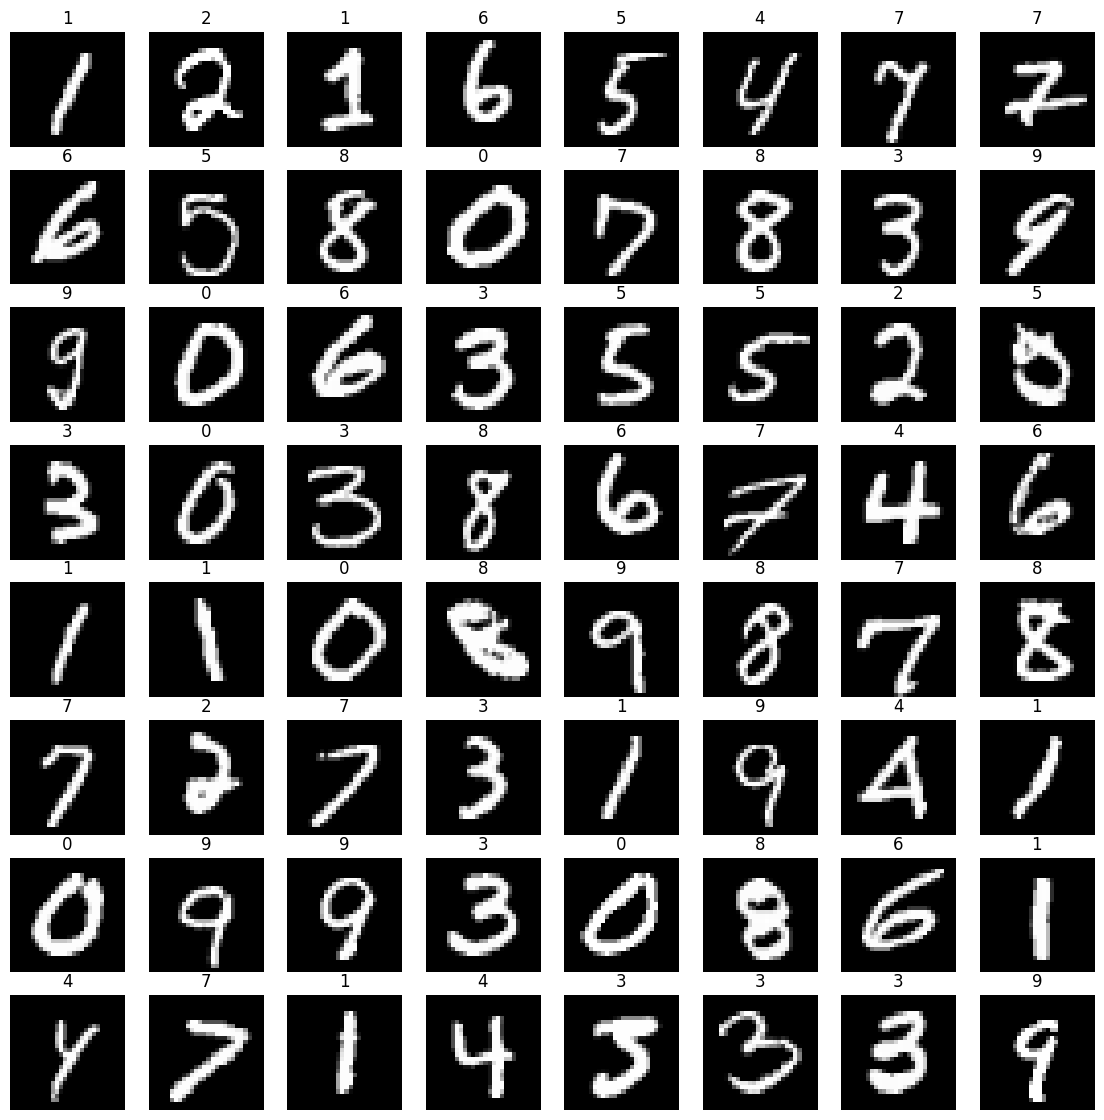
imgs, labels = next(iter(test_loader))

_, axes = plt.subplots(nrows=8, ncols=8, figsize=(14, 14))

for ax, img, label in zip(axes.flatten(), imgs, labels):
    ax.imshow(img.reshape((28, 28)), cmap='gray')
    ax.set_title(label.item())
    ax.axis('off')
8. 테스트 정확도 출력하기
model.eval()

sum_accs = 0

for x_batch, y_batch in test_loader :
    x_batch = x_batch.to(device)
    y_batch = y_batch.to(device)

    y_pred = model(x_batch)

    y_prob = nn.Softmax(1)(y_pred)

    y_pred_index = torch.argmax(y_prob, axis=1)

    acc = (y_batch == y_pred_index).float().sum() / len(y_batch) * 100
    sum_accs = sum_accs + acc

avg_acc = sum_accs / len(test_loader)
print(f'테스트 정확도는 {avg_acc: .2f}% 입니다')
▶ model.eval() : 모델을 테스트 모드로 전환을 하여, GPU의 사용을 줄이는 함수
'Study > 머신러닝과 딥러닝' 카테고리의 다른 글
| [머신러닝과 딥러닝] 22. 포켓몬 분류 (0) | 2024.01.12 |
|---|---|
| [머신러닝과 딥러닝] 21. 전이 학습(에일리언 VS 프레데터 데이터셋 활용) (1) | 2024.01.11 |
| [머신러닝과 딥러닝] 19. CNN 기초 (0) | 2024.01.10 |
| [머신러닝과 딥러닝] 18. 비선형 활성화 함수 (0) | 2024.01.10 |
| [머신러닝과 딥러닝] 17. 딥러닝(AND, OR, XOR 게이트) (1) | 2024.01.10 |
